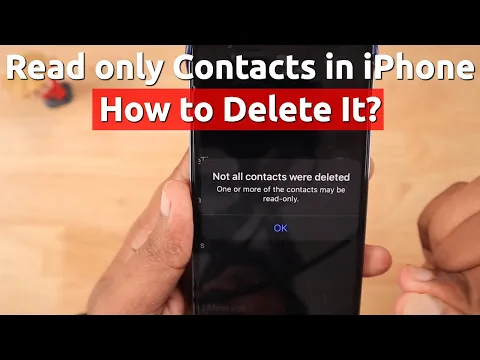
There are a few ways to delete a read-only contact from your iPhone. One way is to go into the “Contacts” app and find the contact in question. Once you’ve found the contact, swipe left on their name and tap the “Delete” button.
Another way to delete a read-only contact is to go into the “Settings” app and tap on “Mail, Contacts, Calendars”. Under the “Contacts” section, tap on the contact that you want to delete and then tap the “Delete Contact” button.
How do I make a contact read-only on my iPhone?
There are a few ways to make a contact read-only on your iPhone. One way is to go into the “Contacts” app and find the contact in question. Once you’ve found the contact, tap on their name and then scroll down and tap on the “Make this Contact Read Only” button.
Another way to make a contact read-only is to go into the “Settings” app and tap on “Mail, Contacts, Calendars”. Under the “Contacts” section, tap on the contact that you want to make read-only and then tap the “Edit” button. Scroll down and tap on the “Make this Contact Read Only” button.
- Can you track a textfree number?
- Which Are the Illuminating Parts of the Microscope?
- How to Tell If Someone Turned Their Location off iPhone?
How do I know if a contact is read-only on my iPhone?
There are a few ways to know if a contact is read-only on your iPhone. One way is to go into the “Contacts” app and find the contact in question. Once you’ve found the contact, their name should have a lock icon next to it if they are read-only.
Another way to know if a contact is read-only is to go into the “Settings” app and tap on “Mail, Contacts, Calendars”. Under the “Contacts” section, tap on the contact in question and then scroll down. If the contact is read-only, it will say so under the “Reading Options” section.
Can I edit a read-only contact on my iPhone?
Yes, you can edit a read-only contact on your iPhone. To do so, go into the “Contacts” app and find the contact in question. Once you’ve found the contact, tap on their name and then scroll down and tap on the “Edit” button. From there, you can edit the contact’s information.
- Why Should an Advertiser Consider Using Responsive Display Ads?
- Can You Leave a Laptop in a Hot Car?
- When Operating a Computer, What Does a User Interact With?
How do I change a contact from read-only to read and write on my iPhone?
There are a few ways to change a contact from read-only to read and write on your iPhone. One way is to go into the “Contacts” app and find the contact in question. Once you’ve found the contact, tap on their name and then scroll down and tap on the “Edit” button. From there, scroll down and tap on the “Make this Contact Read & Write” button.
Another way to change a contact from read-only to read and write is to go into the “Settings” app and tap on “Mail, Contacts, Calendars”. Under the “Contacts” section, tap on the contact in question and then tap the “Edit” button. From there, scroll down and tap on the “Make this Contact Read & Write” button.
How do I make a new contact read-only on my iPhone?
When you create a new contact on your iPhone, it is automatically set to read and write. To change this, go into the “Contacts” app and find the contact in question. Once you’ve found the contact, tap on their name and then scroll down and tap on the “Edit” button. From there, scroll down and tap on the “Make this Contact Read Only” button.
- Can you track a textfree number?
- Can You Freeze Your Location on iPhone?
- Can You Play Gamepigeon on Mac?
How do I make an existing contact read-only on my iPhone?
There are a few ways to make an existing contact read-only on your iPhone. One way is to go into the “Contacts” app and find the contact in question. Once you’ve found the contact, tap on their name and then scroll down and tap on the “Edit” button. From there, scroll down and tap on the “Make this Contact Read Only” button.
Another way to make an existing contact read-only is to go into the “Settings” app and tap on “Mail, Contacts, Calendars”. Under the “Contacts” section, tap on the contact in question and then tap the “Edit” button. From there, scroll down and tap on the “Make this Contact Read Only” button.
- Is John William Weichselbraun Real??
- Who Is Graymalkin in Macbeth?
- Can you use Apple Pay on OnlyFans?
- Do Alcide and Sookie Get Together?
- How to Program Verizon Fios One Remote?
- How To Put Ford F150 In Neutral With Dead Battery?
- Are Cats Nocturnal?
- What is Homology in Evolution?
- Are Relic Purses Real Leather? (Explained)
- How Many Brigades Are There in the 82nd Airborne Division?
- How to Prune a Hackberry Tree?
- How Many Jobs Are Available in Finance Consumer Services?
- Why can’t I link my Geeni to my Google Home?
- Why Are Dubia Roaches Illegal in Florida?
- How To Reset Oil Life On 2019 Ford F250?