Changing the front brake rotors on your Ford F250 4×4 truck is an important maintenance task that can improve braking performance and extend the life of your brakes. While it may seem intimidating, with the right tools and a methodical approach, this is a DIY job that most homeowners can tackle successfully.
In this comprehensive guide, we will walk through the entire process of replacing the front rotors on a Ford F250 4×4, from start to finish. We’ll cover what tools are needed, safety precautions, step-by-step instructions, and tips to make the job go smoothly. With the help of this guide, you’ll gain the knowledge and confidence to swap out those worn front rotors yourself and save on costly repair bills.
What Are the Benefits of Replacing Brake Rotors?
Before jumping into the how-to, let’s first go over why replacing your brake rotors is so important in the first place. Here are some of the main benefits:
- Improves Braking Performance – Over time brake rotors can become warped or develop grooves from the brake pads clamping down repeatedly in the same spots. This can lead to vibrations through the brake pedal or steering wheel when braking. Replacing the rotors removes these warped or grooved areas to restore smooth braking.
- Extends Pad Life – Smooth rotors provide the brake pads with an even surface to press against. Warped or grooved rotors cause uneven pad wear, shortening the life of your brake pads.
- Increases Safety – Worn out or warped brake rotors reduce stopping power and braking effectiveness. Replacing them improves braking performance and safety.
- Reduces Noise – Grooved or warped rotors can cause brake squeal when braking due to the pads vibrating against the uneven surface. New rotors eliminate this annoying noise.
- Saves Money – Doing a rotor replacement yourself costs a fraction of what a shop would charge for parts and labor. Plus it extends the life of other brake components.
So if your Ford F250’s front brakes have been feeling mushy, shaking when braking, or making noise, new rotors can often remedy these issues and restore like-new performance.
- What Causes a Ford F150 to Go into Limp Mode?
- How To Set The Clock On A 2014 Ford F150?
- How Much Is a Car Radiator Worth in Scrap?
What You’ll Need To Do the Job
Replacing brake rotors requires common hand tools that most DIYers will already have in their collection. Here’s a look at the basic equipment you’ll need:
- Floor jack & jack stands – Used to safely lift and support the front of the truck to access the wheels and brake assembly.
- Lug wrench – To remove the lug nuts securing the front wheels. The F250’s lug wrench is often located behind the rear seat.
- Wheel blocks – For blocking the rear wheels once front end is raised.
- Brake caliper wind-back tool – Allows you to safely retract the caliper piston. Can substitute with a C-clamp.
- Bungee cords – For securing caliper after removed so it doesn’t hang by the brake hose.
- Brake cleaner – Removes grease and debris from brake parts.
- Hand-held brake piston tool – Makes pressing in piston easier, but not essential.
- Torque wrench – For tightening lug nuts and brake caliper bolts to the specified torque.
- Socket set & wrenches – For removing caliper bracket and other hardware.
- Hacksaw (optional) – Only needed if rotor is seized to the hub and won’t come off.
- Replacement rotors – Check owner’s manual for proper part numbers.
- Wheel bearing grease – If repacking wheel bearings while changing rotors.
Of course you’ll also need the key maintenance items like work gloves, safety glasses, shop rags, a bucket, brake parts cleaner, etc. Check that you have all tools and materials ready before starting the repair.
Front Rotor Replacement Step-By-Step
With the right gear assembled, you’re ready to dive into the rotor swap. Follow these steps to safely change the front rotors on a Ford F250 4×4:
Step 1: Loosen Lug Nuts & Raise Truck
Begin by using the lug wrench to slightly loosen the nuts securing the front wheels – about 1/4 to 1/2 turn. Don’t fully remove them yet. Then position your floor jack under the front axle and raise up the front of the truck. Place jack stands securely under the frame rails right behind the front wheels. Raise the jack stands until the front tires are lifted completely off the ground.
As a safety precaution, give the truck a shake to ensure it’s stable on the stands before working underneath. You should NOT be able to rock the vehicle. Chock the rear wheels as well.
Step 2: Remove Wheels
With the front end safely supported, finish unscrewing the lug nuts and remove the front wheels. Set both wheels aside along with the lug nuts so they don’t get lost.
Tip: Thread a couple lug nuts back onto the hub studs so that the rotor doesn’t unexpectedly fall off later when removing it.
Step 3: Detach Caliper and Hanger Bracket
Now you can access the brake calipers and rotors. There will be two bolts on the backside of each caliper securing it to a hanger bracket. Carefully remove this caliper mounting hardware.
On some models you may need to remove another bolt or two holding the bracket itself onto a caliper adapter. This will allow the whole assembly to detach.
With the bolts out, carefully work the caliper off the rotor. Don’t let it hang from the brake hose! Use a bungee cord to suspend it securely out of the way.
Step 4: Remove Brake Pads
Before moving to the rotor, also remove the inner and outer brake pads from each caliper. This will allow you to more easily retract the pistons when clearing space for the new rotor. Setting the pads aside will also let you inspect them for wear and replace if needed.
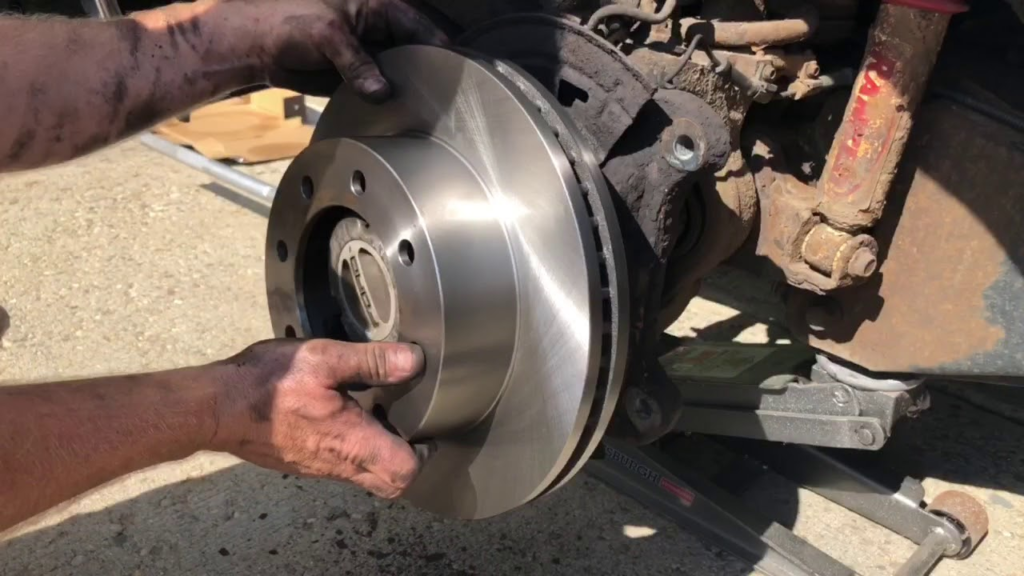
Step 5: Remove Rotor
With the pads out and caliper detached, now you can finally extricate the rotor from the hub/axle. But first, remove those couple lug nuts you threaded on earlier to keep it in place.
If the rotor sticks, use a rubber mallet to give it some gentle taps to dislodge it. Still won’t budge? You may need to use a hacksaw to cut through any visible rust on the hub/rotor surface (be careful not to damage the wheel studs). This can free a seized rotor.
Finally remove the old rotor and set it aside. Take note of any rust or damage on the hub/mounting surface that you may need to clean up.
Step 6: Clean Components
Before installing the new rotor and reassembling, take time to clean all the brake components. Remove any grease or debris from the hub/axle surface. Clean the caliper bracket and caliper with brake parts cleaner.
Make sure the caliper piston is also cleaned off to remove any pad material or rust. Cleaning everything well will ensure smooth operation of the fresh brake parts.
Step 7: Retract Caliper Piston
With the old hardware removed, now you need to push the caliper piston back into the cylinder bore to make room for the thicker new brake rotor.
Use a brake caliper wind-back tool if you have one, or a C-clamp can work. Place it between the piston and back of the caliper, then slowly turn the wind-back tool or tighten the C-clamp. This will evenly press the piston inward without damaging it.
Go slowly and check frequently until the piston is flush with the caliper edge. Wipe away any brake fluid that squeezes out.
Step 8: Install New Rotors
Your Ford F250 4×4 is now ready for the new brake rotors to be installed. Verify you have the correct part number rotors for the front axle. Use brake parts cleaner to wipe them down before installing.
Slide the new rotor over the wheel studs and press it flush against the hub. If it doesn’t want to seat fully, use a rubber mallet to tap it into proper position.
Reinstall a couple lug nuts to hold it in place just until the caliper and pads are remounted.
Step 9: Reinstall Caliper & Brake Pads
Get your caliper brackets, calipers, and brake pads ready for reinstallation on the fresh rotors. Apply a thin layer of brake pad lubricant to the pad contact points where they slide into the caliper.
Now place each pad into position on the new rotor. Slide the caliper carefully back over the rotor and align the mounting holes with the hanger bracket holes. Reinsert the caliper mounting bolts and torque them to the manufacturer’s specs (typically around 125 ft-lbs).
Repeat the rotor, pad, and caliper installation procedure for the other front wheel.
Step 10: Reinstall Wheels & Lower Truck
With the fresh brake hardware installed on both front rotors, you’re ready for the final steps. Remove the lug nuts holding the rotors in place. Reinstall the front wheels and start all lug nuts by hand.
Then lower the truck back down until the front wheels touch the ground. With vehicle’s full weight resting on them again, torque the lug nuts to the specified setting (usually 140-150 ft-lbs on Ford F250s).
Step 11: Check Brake Operation
Before driving off, pump the brake pedal several times to restore proper pad-to-rotor spacing. Check that pedal pressure feels normal and holds when pressed.
Carefully test braking performance at low speeds. The brakes should feel smooth and responsive. If any issues arise with the new rotors and pads, diagnose the problem and fix before driving again.
- How to Install a Gooseneck Hitch in a Ford F250?
- How Much Weight Can a Tacoma Tailgate Hold: A Comprehensive Guide
- How To Reset Oil Life On 2019 Ford F250?
Tips for Changing Ford F250 Front Rotors
To help your rotor replacement job go smoothly and safely, keep these tips in mind:
- Inspect rotors upon removal. Deep grooves or excessive rust/pitting means they needed changing.
- Check thickness of old rotor against a new one. If very thin, change pads too.
- Adjust parking brake shoes outward if new rotor is significantly thicker.
- Lubricate caliper slides and pad contact points with brake lubricant before reinstalling.
- Press caliper piston squarely and slowly to avoid damage.
- Test brake fluid pH if discolored. May need full fluid flush.
- Break-in new pads with moderate stops to allow proper bedding.
- Ensure wheels with rotor hats face out when reinstalling if directional.
- Retorque lug nuts again after around 100 miles of driving.
Thoroughly cleaning parts, taking your time, and double checking your work will help assure safe, properly functioning brakes. Don’t be afraid to ask a knowledgeable friend or mechanic for a hand your first time if needed either.
Signs That Your Front Rotors Need Replacement
Even with regular brake inspections, rotor wear can occasionally catch vehicle owners by surprise. Watch for these common signs that the front rotors on your Ford Super Duty are due for replacement:
- Brake Pulsation – The most common symptom of warped rotors is a vibration through the pedal and/or steering wheel when braking. This pulsating sensation indicates thickness variations in the rotor surface.
- Squealing Noise – High-pitched brake squeal when coming to a stop points to glazing or grooving on the rotor face. This causes vibration against the pads.
- Reduced Braking Power – Diminished stopping ability coupled with longer pedal travel signals excessive rotor wear. Thinner rotors require greater pedal force.
- Visible Damage – Visually inspect rotors for discoloration, grooving, rust, and lip around the edges. Any signs of abnormal wear mean replacement time.
- Pointer Deflection – Excess pointer deflection during braking with dial indicators on the rotors indicates a warped surface.
- Wheel Imbalance – If a front tire needs frequent rebalancing, it may be due to a warped brake rotor. The heavier, uneven rotor causes imbalance.
Don’t let worn rotors get to the point of metal-on-metal contact with the pads or catastrophic failure. Address any signs of wear right away for safe braking.
- How to Clean Ford F250 Exhaust Filter? A Step-by-Step Guide
- How To Replace Ford F150 Oil Pump?
- How To Change Rear Rotors On Ford F350 Dually?
How Often Should Rotors Be Changed?
With routine use, most quality drilled or slotted rotors can last upwards of 70,000 miles before requiring replacement. But there are several variables that impact the lifespan of your brake rotors:
- Driving Habits – Frequent high-speed stops, towing heavy loads, aggressive driving accelerates wear.
- Mileage – Rotors usually outlive pads. Many mechanics suggest changing rotors when installing the 3rd set of new pads.
- Climate – Exposure to rain, snow, and road salt promotes rusting of rotors over time.
- Brake System – Larger calipers, performance pads, upgraded brake fluid increase rotor temps and wear rate.
- Rotor Type – Standard rotors wear quicker than thicker, high-carbon, cross-drilled or slotted rotors.
Watch for the symptoms mentioned earlier and have rotors measured during tire rotations or oil changes. This gives a clear indication of how much material remains and when they need swapping out. Both front rotors should always be replaced together for even braking.
Can I Resurface Rotors Instead?
You may be wondering if you can resurface (or machine) your worn front brake rotors instead of fully replacing them. Here are the pros and cons of resurfacing versus replacing rotors:
Pros:
- Less expensive than new rotors
- Able to correct minor warping or thickness variations
- Extends lifespan slightly if rotor is not too worn
Cons:
- Only removes a small amount of material
- Not effective on severely worn or damaged rotors
- May eventually need replacing anyway after resurfacing
- Reduces effective rotor thickness over time
- Not always cost effective on pickup truck rotors
For best results, many Ford F250 owners find it makes sense to invest in new rotors when braking performance declines. Talk with your favorite mechanic to decide if resurfacing could work temporarily in your situation.
- How To Replace Ford F250 Roof Molding?
- Who Bought Out Rinker Boats?
- How To Replace Ford F250 Body Mount Bushings?
Let’s Review the Step-by-Step Process
Now that you’re fully prepped on the ins and outs of replacing Ford F250 front rotors, let’s do a quick rundown of the complete process:
- Loosen lug nuts, raise front of truck, and support with jack stands
- Remove front wheels.
- Unbolt brake caliper and detach from rotor.
- Remove inner and outer brake pads.
- Extract old rotor from hub.
- Clean all brake components.
- Retract caliper piston with C-clamp or wind-back tool.
- Install new replacement rotor.
- Reinstall brake pads and caliper.
- Bolt wheels back on and lower truck.
- Pump brakes to seat pads and test brake operation before driving.
Equipped with these steps and tips, you can now replace those worn front rotors and restore safe braking performance in your Ford F250 4×4. Just allow enough time for the job, exercise patience, and use the proper tools.
FAQ – Common Rotor Replacement Questions
Still have some lingering questions about changing rotors on your Super Duty truck? Here are answers to some of the most frequently asked questions:
Should I replace pads when installing new rotors?
This is advisable but not an absolute necessity. Inspect pad thickness and material condition when changing rotors. Worn thin or contaminated pads will function poorly with new rotors.
How do I know if rotors are directional when installing?
Look for small arrow markings on the rotor face indicating the direction of forward wheel rotation. Position accordingly when reinstalling wheels.
What is brake bedding for new pads and rotors?
Bedding-in new parts involves making light stops from moderate speeds to transfer an even layer of pad material onto the rotor surface. This improves braking performance.
Can I replace just one front rotor if only it is bad?
It is best practice to always change both front rotors simultaneously to retain equal braking side-to-side.
Is it ok to drive with the emergency brake on to seat the new pads?
No, don’t use the parking brake to force pads against rotors. This risks brake damage. Proper seating occurs naturally after a few gentle stops.
Should I lubricate anything when reassembling brakes?
Yes, apply brake lubricant to pad contact points on caliper, caliper guide pins, and slide surfaces where applicable. Avoid lubricating the rotor or pad frictional surfaces.
Don’t hesitate to reach out to a professional brake technician if you need assistance with servicing your Ford F250 or have additional questions not covered here. And be sure to practice safe jack usage and follow all safety steps outlined in this article.
With consistent brake care and diligent home maintenance, your trusty workhorse Ford truck will continue cruising the highways and hauling heavy loads while stopping safely and reliably for years to come.
- Are Roofs Safe to Sit On?
- how old is collin johns pickleball?
- Should I Sign a Tomlin Order?
- Which of the Following Most Often Distracts Older Drivers?
- Can You Fake a Live Pic on Kik?
- how fast does a pickleball travel?
- Can Cats Eat Cornstarch? [Benefits/Risks To Know]
- Does an EKG Show Angina?
- Does MuleSoft Require Coding?
- Are Apple Watches Waterproof?
- Can You Send an Alarm to Someone’s iPhone?
- What Does Hydration Percentage Mean?
- Did Fuddruckers Go Out of Business?
- Are Coffee Grounds Good for Plants?
- What Are the Most Survivable Cancers?