If you’re looking to clean your Bissell Crosswave Pet Pro, you’ll need to disassemble it first. This guide will walk you through the steps for disassembling the vacuum, as well as some things to keep in mind during the process. Additionally, we’ll touch on some of the challenges you may face while disassembling the Bissell Crosswave Pet Pro.
What Are the Steps for Disassembling the Bissell Crosswave Pet Pro?
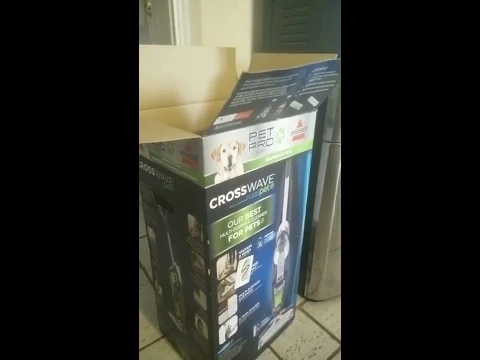
The Bissell Crosswave Pet Pro is a powerful and versatile cleaning tool that is perfect for homes with pets. It can be used on a variety of floor types, and it comes with a number of useful attachments that make it even more versatile. If you need to clean your Bissell Crosswave Pet Pro, or if you simply want to disassemble it for storage, here are the steps you need to follow.
1. Unplug the Bissell Crosswave Pet Pro from the power outlet and remove the battery.
2. Remove the solution tank by pressing the release button and lifting it up.
3. Remove the brush roll by pressing the release button and lifting it up.
4. Remove the dustbin by pressing the release button and lifting it up.
5. Remove the handle by pressing the release button and lifting it up.
6. Remove the power cord from the power cord wrap and untangle it from the machine.
7. Once all of the parts have been removed, you can begin cleaning them. The brush roll and solution tank can be washed in warm, soapy water. The dustbin can be emptied and rinsed out as needed.
8. To reassemble the Bissell Crosswave Pet Pro, simply reverse the steps above. Make sure that all of the parts are securely in place before plugging the machine in and turning it on.
- Why Is My Humidifier Spitting Out Water?
- Why Is My Febreze Plug In Blinking?
- Why Is Your Blendjet Blinking Red?
What Are Some of the Things You Need to Keep in Mind When Disassembling the Bissell Crosswave Pet Pro?
When you’re ready to disassemble your Bissell Crosswave Pet Pro, there are a few things you’ll need to keep in mind. First, make sure that you have all of the necessary tools. You’ll need a Phillips head screwdriver, a flat head screwdriver, and a putty knife.
Next, you’ll need to remove the battery. To do this, first remove the four screws that hold the battery cover in place. Once the cover is off, you’ll see the battery compartment. Use a putty knife to release the battery from its compartment, and then unplug the battery from the rest of the device.
With the battery removed, you can now unscrew the four screws that hold the handle in place. Once the handle is removed, you’ll be able to access the inside of the device.
Now, you’ll need to remove the brushroll. To do this, first remove the screw that holds the brushroll cover in place. Once the cover is off, you’ll see the brushroll. Grab the brushroll and pull it out of the device.
With the brushroll removed, you can now unscrew the two screws that hold the motor in place. Once the motor is removed, you’ll be able to access the inside of the device.
Finally, you’ll need to remove the dustbin. To do this, first remove the screw that holds the dustbin cover in place. Once the cover is off, you’ll see the dustbin. Grab the dustbin and pull it out of the device.
With the dustbin removed, you can now access the inside of the device. You can now begin the process of cleaning the device.
What Are Some of the Challenges You May Face When Disassembling the Bissell Crosswave Pet Pro?
One of the biggest challenges is that there are a lot of small parts to keep track of. When you are taking the machine apart, it is important to pay attention to where all of the small pieces go. Otherwise, you may have a difficult time putting it back together.
Another challenge you may face is that the instructions that come with the machine are not always clear. This can be especially true if you are not familiar with how to disassemble a floor cleaning machine. If you run into this problem, it is important to consult with someone who is familiar with the process.
Finally, you may also find it challenging to get all of the parts back in the right place. This is because there are a lot of different parts that make up the Bissell Crosswave Pet Pro. If you are having trouble, it is important to take your time and make sure that everything is in its proper place before you try to use the machine again.
Overall, there are a few challenges that you may face when disassembling the Bissell Crosswave Pet Pro. However, as long as you take your time and pay attention to the process, you should be able to get the job done without too much trouble.
- When Does Ward Die?
- When Was Saudi Arabia Founded?
- Can You Clean a Smoke Buddy?
- Can Inkjet Print on Glossy Paper?
- What Is Agglomerative Clustering in R?
- When Did the Mayan Number System Start?
- What Are Models and Theories?
- Why Is My Polygel Not Sticking to My Nail?
- Can Cats Eat Cornstarch? [Benefits/Risks To Know]
- How Do Most Meteoroids Form?
- How Many Jobs Are Available in Edp Services?
- Why Has DDT Considered a Good and Effective Insecticide?
- How Big Do Swordfish Grow?
- What Happens When Water Is Deionized?
- What Happens to Alveolar Pressure During Expiration?