Plaster walls can develop an uneven, bumpy texture over time. Cracks, high edges, and rough patches often appear as the plaster ages and dries out. While this distressed look has a rustic appeal, most homeowners prefer the clean look of smooth walls. Thankfully, it is possible to smooth out plaster walls and achieve an even surface.
With some time and effort, you can transform those bumpy, aged plaster walls into a pristine canvas. The secret lies in filling in the low spots and sanding down any high points to create a flat surface. This article will explore several effective techniques to help you smooth plaster walls.
Why Do Plaster Walls Get Uneven and Bumpy?
Before learning how to fix uneven plaster walls, it helps to understand what causes this texture in the first place. Here are some of the main reasons plaster walls can develop bumps and uneven spots over time:
- Natural aging and drying of the plaster: Plaster is a porous material that shrinks slightly as it dries and ages. This natural process can cause uneven spots, indentations, or raised areas.
- Cracks: Stress, expansion/contraction, or weak plaster can cause cracks. As plaster shifts and settles around cracks, ridges or uneven edges often form.
- Poor plaster application: Bubbles, lumps, or thin spots in the original plaster job will lead to uneven drying and bumpy texture.
- Water damage: Exposure to moisture causes plaster to swell, bubble, and crack, creating very uneven textures as it dries out.
- Wall movement: If the wall itself shifts due to structural issues, it can warp the plaster layer and create bumps or ridges.
While plaster cracks and bubbles are natural, extensive water damage or structural issues should be addressed before smoothing walls.
Step-by-Step Process for Smoothing Plaster Walls
Smoothing uneven plaster walls is a multi-step process. The general steps are:
- Prepare the walls
- Fill cracks and holes
- Sand high spots
- Skim coat with plaster
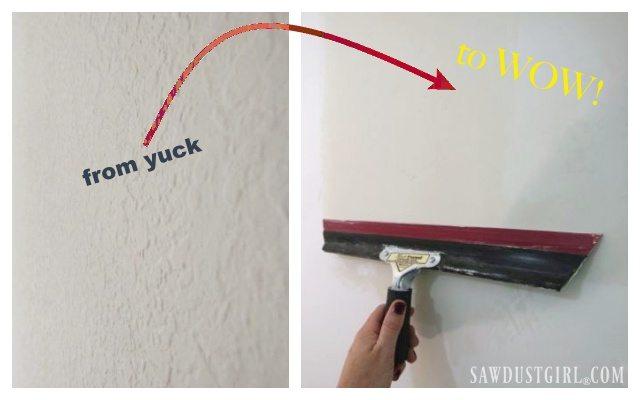
- Smooth with trowel/squeegee
- Prime and paint
Proper prep work is the key to getting beautifully smooth results. Here is a more detailed look at the smoothing process:
1. Prepare the Wall Surface
Proper prep ensures your smoothing materials adhere well. To prepare walls:
- Clean thoroughly to remove grease, dirt, or peeling paint
- Scrape off any loose plaster or flaking paint
- Sand lightly with 100-150 grit sandpaper
- Dust walls and ensure surface is clean and dry
Tip: Look closely for any unsound plaster or cracks wider than 1/8-inch and repair them first with patching compound.
2. Fill Cracks, Holes, and Low Spots
Use spackling paste or lightweight joint compound to fill any cracks, gouges, or indentations.
- Apply filler material with a putty knife, pressing into holes and gaps.
- Smooth and flatten with putty knife. Let dry completely.
- Lightly sand hardened areas flush with the wall.
This helps level the surface before skim coating.
3. Sand Down High Edges and Ridges
Use a sanding sponge or fine sandpaper to knock down any high spots, ridges, or bumps:
- Sand in a circular motion. Check often to see if surface is flattening out.
- Take care not to sand into the plaster, just flatten bumps.
- Clean up dust when done.
Tip: For convenience, use a sanding pole and sandpaper to reach high areas.
4. Skim Coat Walls with Plaster
Applying a thin skim coat of plaster is the most effective way to smooth walls. It fills low spots and coats high spots to create a flat surface.
To skim coat over existing plaster walls:
- Mix plaster per manufacturer’s instructions. Use lightweight plaster for easier application.
- Hold trowel at 45 degree angle to apply thin coat, pressing into surface.
- Work in sections, using an “X” pattern of strokes to distribute plaster evenly.
- Let dry, then scrape or sand any high ridges or drips smooth.
Allow plaster to dry fully between coats. One skim coat is often sufficient for minor bumps. Severely uneven walls may need two coats.
5. Smooth and Finish the Plaster
Once plaster has dried completely, the final smoothing steps help polish the surface:
- Gently sand any remaining ridges or imperfections.
- Wipe clean to remove plaster dust.
- Apply a very thin finish coat and smooth immediately with drywall knife or special plaster blade. Remove any excess.
- The skim coat and finish plaster coat together should be less than 1/8-inch thick total.
- Allow plaster to fully cure and dry before painting.
The finished surface should look pristine and even, without bumps, ridges, or uneven texture.
6. Prime and Paint Walls
Priming ensures paint adheres properly. Use high-quality drywall primer or masonry primer and apply evenly over entire surface.
Once primed, the walls are ready for your choice of paint color and finish! Flat or matte paint helps hide any remaining minor imperfections better than glossy paint.
Pro Tips:
- Work in small sections for easier plaster smoothing and to prevent lap marks at edges.
- Keep tools and sponges clean to avoid leaving dried plaster behind.
- Wear a dust mask when sanding and clean up with a shop vac.
With some elbow grease and these plaster smoothing techniques, it is possible to have beautifully smooth walls once again without replacing the plaster. Just take it slow and focus on prep work. The finished results will be well worth the effort!
Alternative Methods to Smooth Plaster Walls
If you want to avoid the mess and effort of plastering, there are some alternative approaches to smoothing and renewing plaster walls:
Use Joint Compound Instead of Plaster
Pre-mixed lightweight joint compound, often used for drywall finishing, can also be used to skim coat plaster walls. The process is the same, but joint compound is easier to apply. It sands easily too.
Joint compound dries faster than plaster, so you can complete smoothing in less time. It leaves a slightly different surface finish but still smoothes walls effectively.
Sand Walls Down with Sandpaper
For minor bumpiness, you may be able to smooth walls just by sanding. Use a sanding block and 100-150 grit sandpaper to gently sand down any high spots.
Work methodically across the wall surface. This takes patience but avoids adding new layers of plaster or compound.
Finish by dusting and wiping sanded walls clean before priming and painting.
Use Thin Wall Lining Paper
Adhesive-backed wall lining paper can mask bumps and create a smoother surface. Simply clean walls, apply adhesive to the wall surface, smoothe the lining paper over the adhesive, and use a smoothing tool to remove any air bubbles or creases.
Most wallpaper smoothing products are paper-thin so they don’t add thickness. The smooth paper surface hides imperfections.
Try “Dabbing and Dotting”
For DIYers, a technique called dabbing and dotting lets you smooth walls without sanding or skim coating. You simply fill low spots with joint compound or spackle using a plastic grocery bag or wadded paper:
- Dab the bag into the filler material and then dab it onto low spots and voids in the plaster.
- Dot on filler directly with your finger for precision work.
- Once dry, sand or scrape off only the highest bumps and ridges.
This simpler approach works decently well for minor smoothing and irregularity.
- When Do Pallbearers Carry the Casket?
- Are Boneyard Bars Worth It?
- How to Make a Split Level Home Handicap Accessible?
When to Call a Professional for Plaster Walls
Extensive cracking, crumbling plaster, or major water damage and deterioration may require professional help. Refinishing severely damaged plaster walls is difficult for DIYers to tackle.
Signs you need a pro plasterer:
- Large cracks wider than 1⁄4-inch
- Deep gouges or missing chunks of plaster
- Walls that sound hollow when tapped
- Major loosening, crumbling, or instability
- Evidence of a leak or moisture problem
- Large-scale paint peeling
A professional can assess if walls can be repaired or need replacing. They have specialized tools and materials for handling major plaster damage. This helps ensure repairs hold up long-term.
For historic homes with fragile plaster walls, contacting a plaster restoration specialist is wise. They use specialized techniques tailored for vintage plaster.
Maintain Smooth Plaster Walls
Once you’ve smoothed and renewed your plaster walls, follow these tips to help them stay looking great:
- Allow new plaster coats to cure fully before painting. This prevents future cracking or peeling.
- Use high-quality primer and paint designed for plaster. Avoid glossy paints.
- Caulk where wall meets trim or ceiling to protect from moisture intrusion.
- Keep gutters clean and address any exterior moisture sources like leaks. Preventing interior water damage helps plaster last.
- Spot treat any new hairline cracks that appear with spackle to keep them from expanding.
- Consider sealing very porous, soft plaster with a masonry sealer before painting. This stabilizes delicate old plaster.
With attentive maintenance and care, your refreshed smooth plaster walls will provide years of renewed function and beauty in your home.
- Do I Need a Permit for Excavation?
- Why Did Gamages Close?
- How much is flight ticket to Abuja from Ibadan?
Summary of How to Smooth Plaster Walls:
- Bumpy plaster walls are caused by natural aging, cracks, poor application, wall movement or water damage.
- Smoothing involves cleaning, filling cracks, sanding, skim coating with plaster, and priming before painting.
- A thin finish coat creates an ultra-smooth surface. Allow plaster layers to fully dry between applications.
- Alternatives like joint compound, sanding, wallpaper and dabbing techniques can also work to smooth walls.
- For severely damaged plaster, hire a professional plastering contractor for repairs.
- Once smoothed, maintain walls by allowing proper cure time before painting, controlling moisture, and sealing cracks.
Additional FAQs about Plaster Walls:
What is the easiest way to smooth rough plaster walls?
The easiest method is to skim coat walls with a thin layer of lightweight premixed joint compound. Joint compound spreads easily and dries smooth. Sanding between coats helps achieve a perfectly smooth finish.
Should I use plaster or spackle on walls?
For small cracks and holes, lightweight spackle works well. But for smoothing large areas or damaged walls, plaster is better. Real plaster contains lime that lets it spread thinly without shrinking or cracking as it dries. Premixed lightweight plasters are the most DIY-friendly.
Do you have to wet plaster walls before painting?
Newly plastered walls need time to fully cure and dry before painting or they may develop cracks. Drying times range from 7-30 days. Test wall moisture before painting. Wipe with a rag – if it comes away clean, the wall is ready for paint. New plaster does not need water applied before painting primers or paints.
How long does plaster take to dry before painting?
Plaster drying time depends on thickness and environment. Thin skim coats may dry in 1-2 days, while thick plaster layers can take 30 days or longer to fully cure. Hot, dry conditions speed drying. Cool, humid climates delay it. Test drying with a moisture meter before painting.
How do you fix cracked plaster walls?
For minor cracks, clean out loose debris and fill with spackle, smoothing flush. Hairline cracks can simply be sealed by priming and painting. For large cracks wider than 1/4 inch, cut out a V-shape, insert backer mesh, and fill with patching plaster. Address underlying causes like leaks to prevent new cracking.
With the right approach and techniques, it is definitely possible for DIYers to tackle smoothing and renewing plaster walls. While it takes some time and elbow grease, the reward is walls with a revitalized, pristine finish. Follow the tips outlined here, take your time with the process, and you can restore the smooth, flawless look of your home’s plaster walls.
- How to Remove Ford F150 Kick Panel? A Step-by-Step Guide
- Why Is My Bearded Dragon Running Around Like Crazy?
- How Old Is Riley Newman Pickleball?
- Can Balloons Be Refilled with Helium?
- Can I see who views my collections on Facebook?
- How to Clean Starpil Wax Warmer?
- What’s a Ramer Sponge?
- Are Chia Seeds Good for You?
- What Is Tire Feathering?
- How Do You Fight the Feeling Lil Peep?
- How to Watch Impractical Jokers on Hulu?
- How To Change Ford F350 Key Fob Battery?
- Does Spicy Food Help with Sickness?
- Does Algae Get Rid of Waste?
- Super Bowl: The Biggest Football Game of the Year